Dynamic lock is designed to improve security by automatically locking your computer when you forget to do so manually. To accomplish this feat, you should establish a Bluetooth connection between your PC and your phone first. Here let’s take a closer at how to enable Dynamic lock with a few clicks.
1. Click Start icon at the bottom left of the screen, next click Settings icon in the pop-up window.

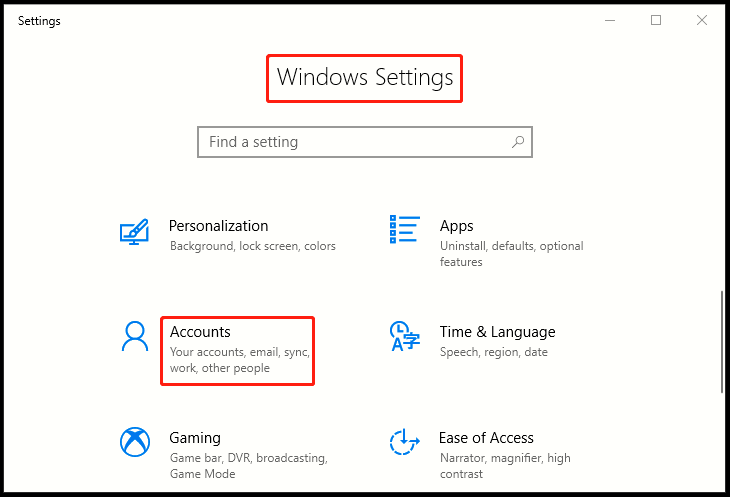
2. The Windows Settings dialog box will display, scroll down and click Accounts button.

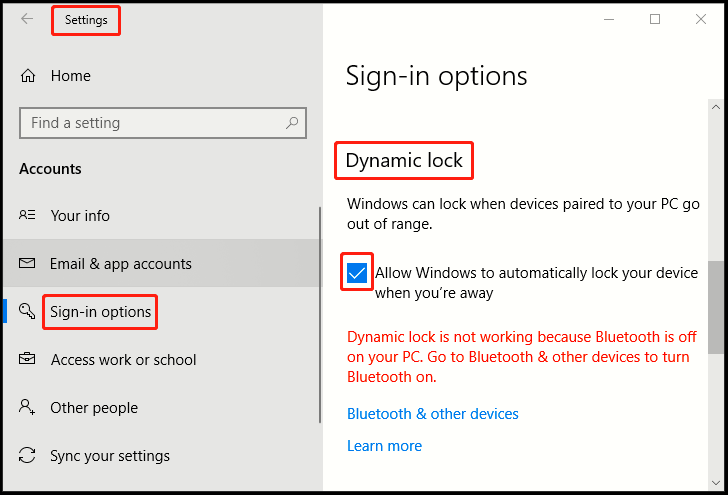
3. Another window of Setting appears, click Sign-in options in the left pane, then go to the right pane, scroll down and find Dynamic lock section. Simply check the box of Allow Windows to automatically lock your device when you’re away.
4. Note: Dynamic lock is not working because Bluetooth is off on your PC. Go to Bluetooth & other devices to turn Bluetooth on.

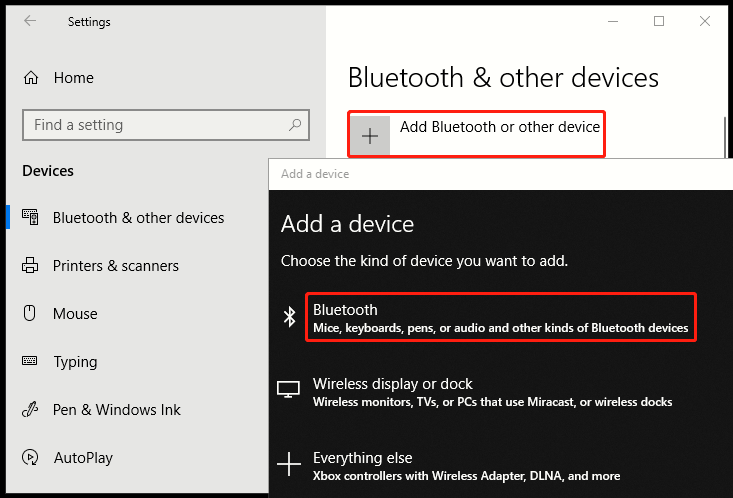
5. Ensure Bluetooth is first toggled on, then hit Add Bluetooth or other devices, and select Bluetooth in the window of Add a device.
6. Click the appropriate device, and then wait for the PC and mobile phone to pair. You might accept a prompt or two to complete the whole process, depending on your phone.

7. Take the phone with you when moving away from PC, and it will automatically lock a minute or so after you’re out of Bluetooth range. (Bluetooth range varies by devices). However, remember that this security feature is meant to lock your PC when coming back, you’ll need to enter password to unlock it.

Leave a Reply