If the speed of mouse pointer is relatively slow, then operation range of dragging will be larger, which makes it more tired, especially when working on a computer for a long time. Fortunately, you can adjust mouse pointer speed in your Windows 10 PC with these simple steps.
1. Press the shortcuts [Win] + [R] on your keyboard to invoke Run Command dialog.

2. Type “control” in the textbox and then hit OK or simply press [Enter] key on your keyboard.

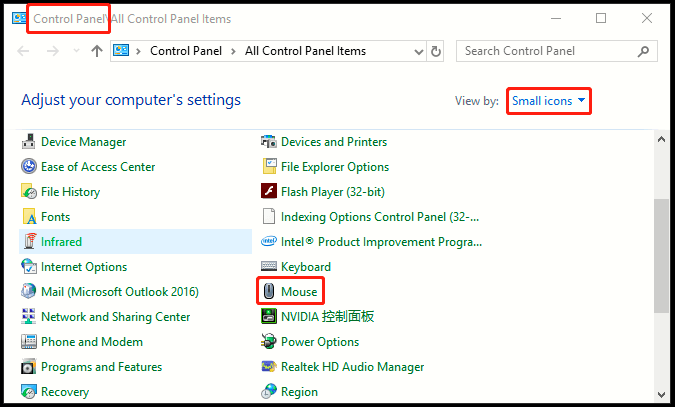
3. When Control Panel dialog box appears, select Small icons from the drop-down list of View by, then scroll down and hit Mouse button.

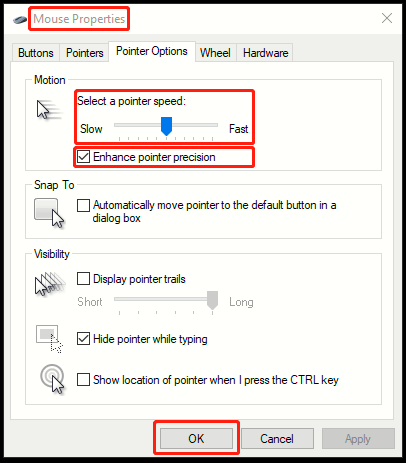
4. Mouse Properties window will come up, go to Pointer Options tab- Motion Section, simply drag the cursor between Slow and Fast to select a pointer speed as needed, and you can also check the box of Enhance pointer precision to improve user experience. Do not forger to click OK at the bottom to save all settings.


Greetings, nice site you’ve gotten presently.