It’s common to adjust the row height and column width in Excel while editing a table, especially when the content is too much to fit in the cell’s size.
The most direct way for this situation is moving your mouse to drag the rows or columns, which you should’ve used for many times before. But if you want to change the settings for the whole table, this method doesn’t seem to work.
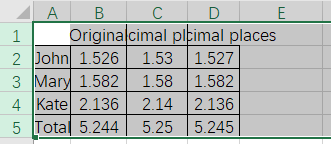
Taking this table as an example. The size of cells is obviously not suitable for the content. Let’s see how to adjust it insuflaveis.

1. Row Height
Dragging your mouse to select all the row headers in the left. Make sure they all turn into green.

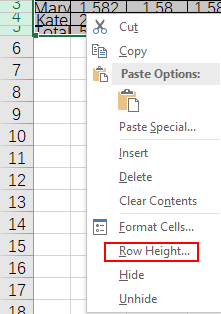
Right click the selected area and choose Row Height in the list.
Input the precise number of row height in the window popping out.
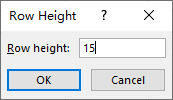
Now the row height of the whole table has been set to 15.
Column Width
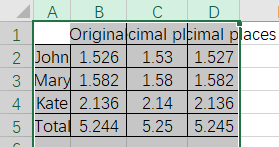
Similarly, choose all the columns you want to adjust by selecting the column headers above, and make sure they all turn into green.
Right click the selected area and choose Column Width in the list.
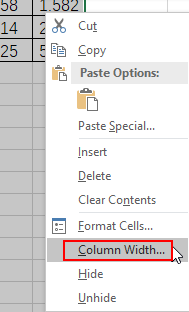
Set the precise value of column width in the popping out window.
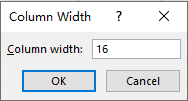
Now the column width of the whole tab has been modified to fit the text in it. You can also selectively adjust one or several rows/columns in the same way.


Leave a Reply