A high resolution in Excel will significantly increase the size of the document. Accordingly, you can control the file size by selecting a proper resolution. For example, if you need to send an EXCEL file with mail, free up more space on your hard drive, or reduce its upload / download time on Internet, you can reduce the file size by specifying a lower resolution.
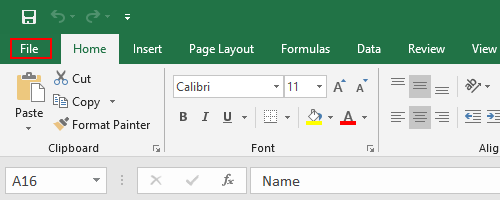
To change the resolution of Excel, open the Excel file and switch to File tab.

Click Options in the left sidebar.

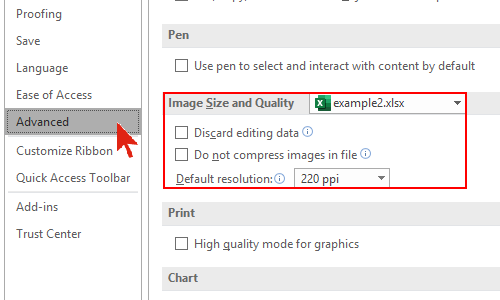
Select Advanced panel and scroll down the page to find the Image Size and Quality section.

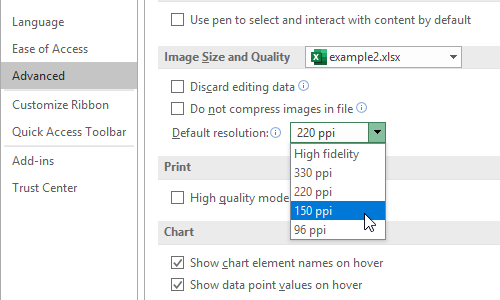
Click the small arrow of Default resolution and choose an option in the drop-down menu. If you want to minify the file size, choose a lower resolution. Thus the picture inserted to Excel will be downsampled to the specified number of pixels per inch. Otherwise you can choose a higher resolution to improve the quality. Furthermore, you can even check Do not compress images in file. Then the inserted picture will stay as the maximum quality instead of being compressed.

After all these steps, click OK to implement the setting. Now the resolution of Excel file has been changed.

Leave a Reply