You may already get used to the default mouse pointer cause it’s one of the most common icons in Windows 10. But do you know you can also customize the mouse pointer as you like?
The steps are as below:
1. Hit Start button at the bottom left corner of the screen, and click the icon of Settings.
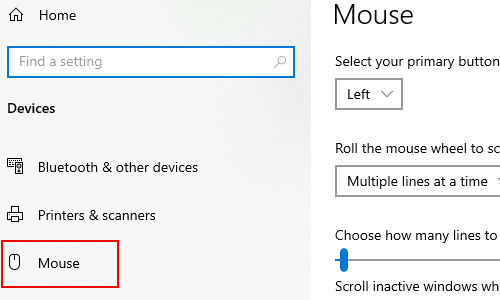
2. Choose Devices in Windows Setting.
3. Switch to Mouse tab, click Adjust mouse & cursor size under Related settings (on the right side).

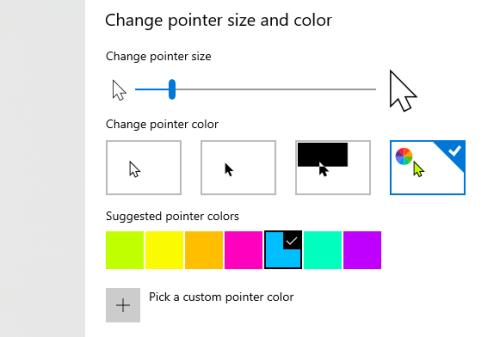
4. Here you can Change pointer size, Change pointer color, or even Pick a custom pointer color as you like.

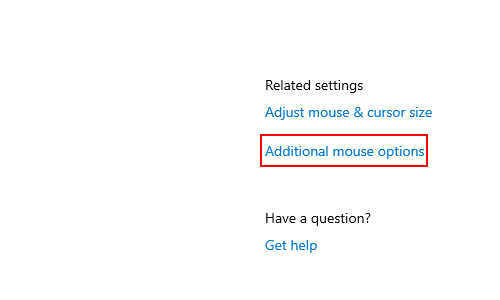
5. If you want to adjust the setting for mouse pointer more precisely, you can click Additional mouse options in Related settings.

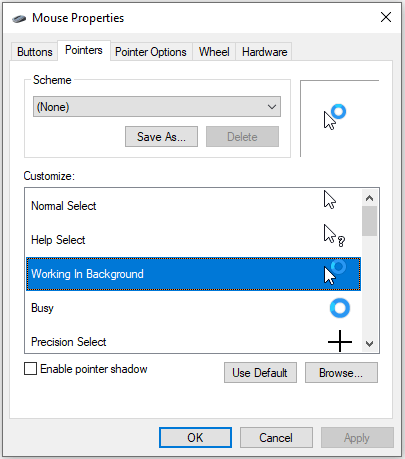
6. Then you can do further setup in Pointers tab of Mouse Properties. Here you can choose a Scheme, or specify the icon for each status of mouse pointer separately. After finishing the setting, click Apply to implement it, and hit OK to quit Mouse Properties.


Thanks for this good content, if help me more.
ok