When editing with Microsoft Word, the red wavy underline will appear if you make a mistake, especially some unusual words or names. It is definitely a distraction to interrupt your train of thought. Actually it is the automatic spell and grammar checking function, and we could turn it off if you don’t need it.
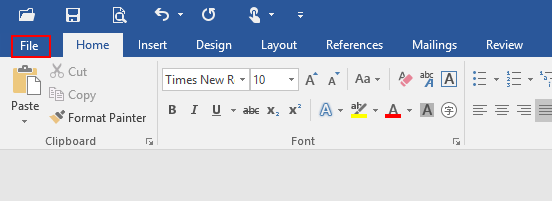
1. Click File at top left.

2. Click Options at bottom left.

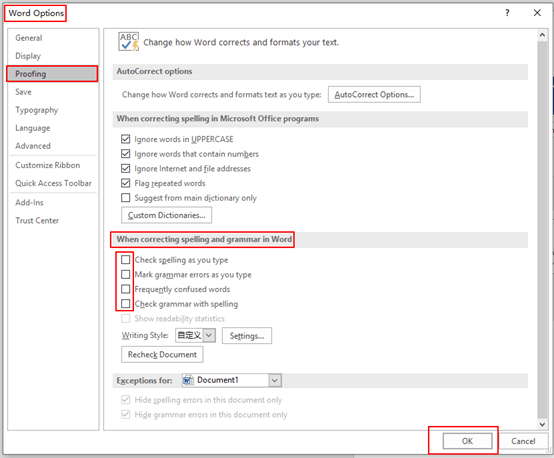
3. The Word Options dialog box will display, go to Proofing tab, find When correcting spelling and grammar in Word section. Uncheck the related boxes as below according to your preference and hit OK at bottom right:
1). Checking spelling as you type
2). Mark grammar errors as you type
3). Frequently confused words
4). Check grammar as spelling
Note: if you want to activate spell and grammar checking, just repeat above steps and check the boxes of the four detailed options as you like.

4. If you have turn off spell and grammar checking, please do remember to check them manually. Otherwise there may be multiple errors in the document, which could cause unnecessary trouble and serious consequences. Go to Review tab and click Spelling & Grammar, then you will not worry about any mistakes.


Leave a Reply