We all know the US election in 2020. Joe Biden defeats Donald Trump to win the presidency. The results of this election were obtained through voting by the American people. Ok, let’s end here, we don’t talk about politics, we only talk about Microsoft tips. In addition to the US election, you may also need to vote in your, family, class, or community to make some decisions.
Today, the author will share with you guys how to create a voting system just in Excel. There may be many steps in this tutorial, but the author recommends that you open an Excel sheet to have a try when you read this. Let’s get to start.
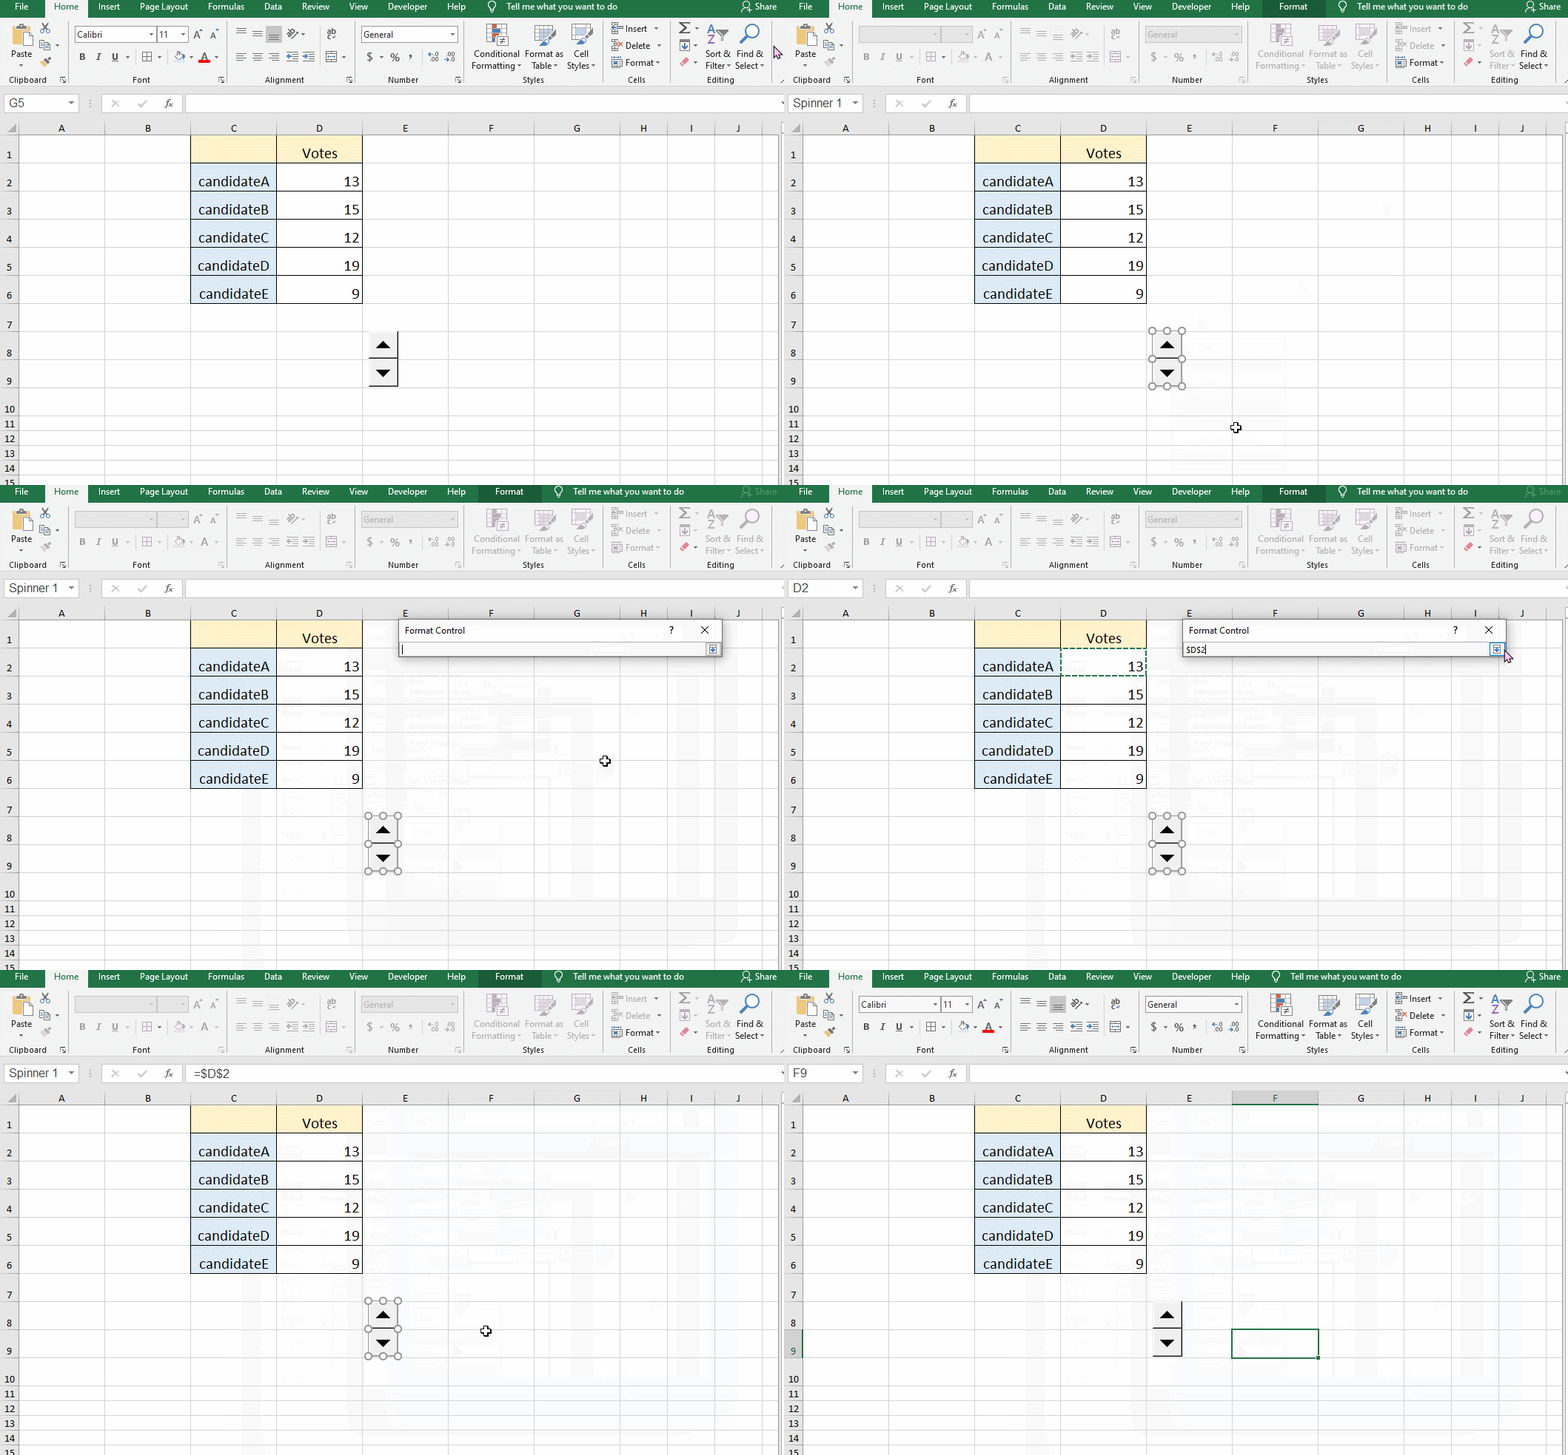
Step1:Insert Pin Buttons (Form Control)


If we enter the number of votes manually can be troublesome in area D2:D6, so we use the pin button to control this area. Take the button we just inserted as an example. Let’s use the button to control the D2 value.
Step2:Right-click the button and choose Format Control. Click D2 cell as Cell Link in the Control window.


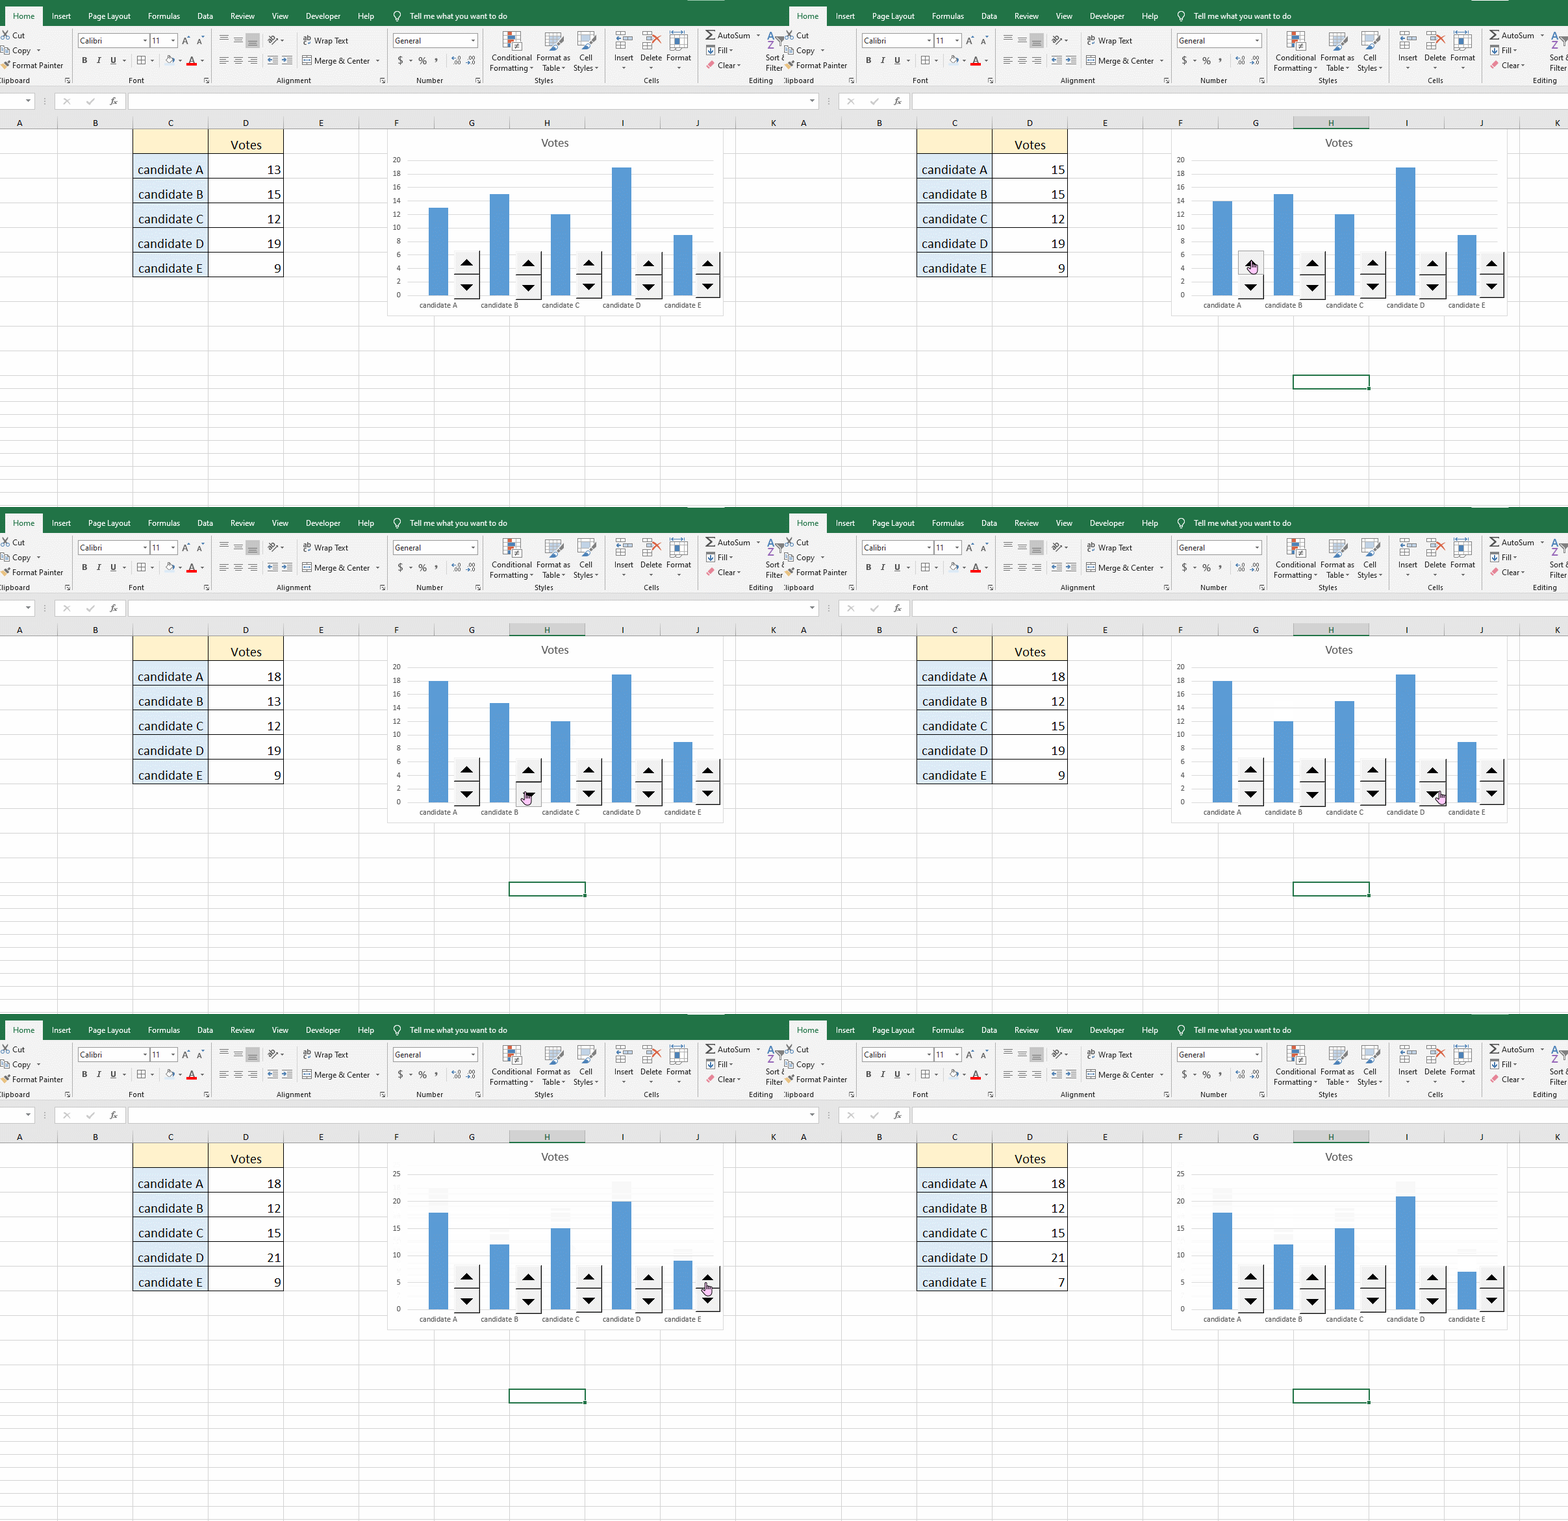
Now you can copy and paste to get 5 Pin Buttons to represent each candidate. (Remember to change the buttons’ Cell Link.)

Step3:Insert a Chart
Select the cell area and insert a chart. You can choose the chart style you like.

Right-click the chart and click on Sent to Back, then you can adjust the position of the previous 5 Pin Buttons up to the chart.


If you have finished all the previous steps, this can already meet the needs of daily voting. In the next part, the author will teach you some more difficult operations. These steps can help you visually see who the top three are.
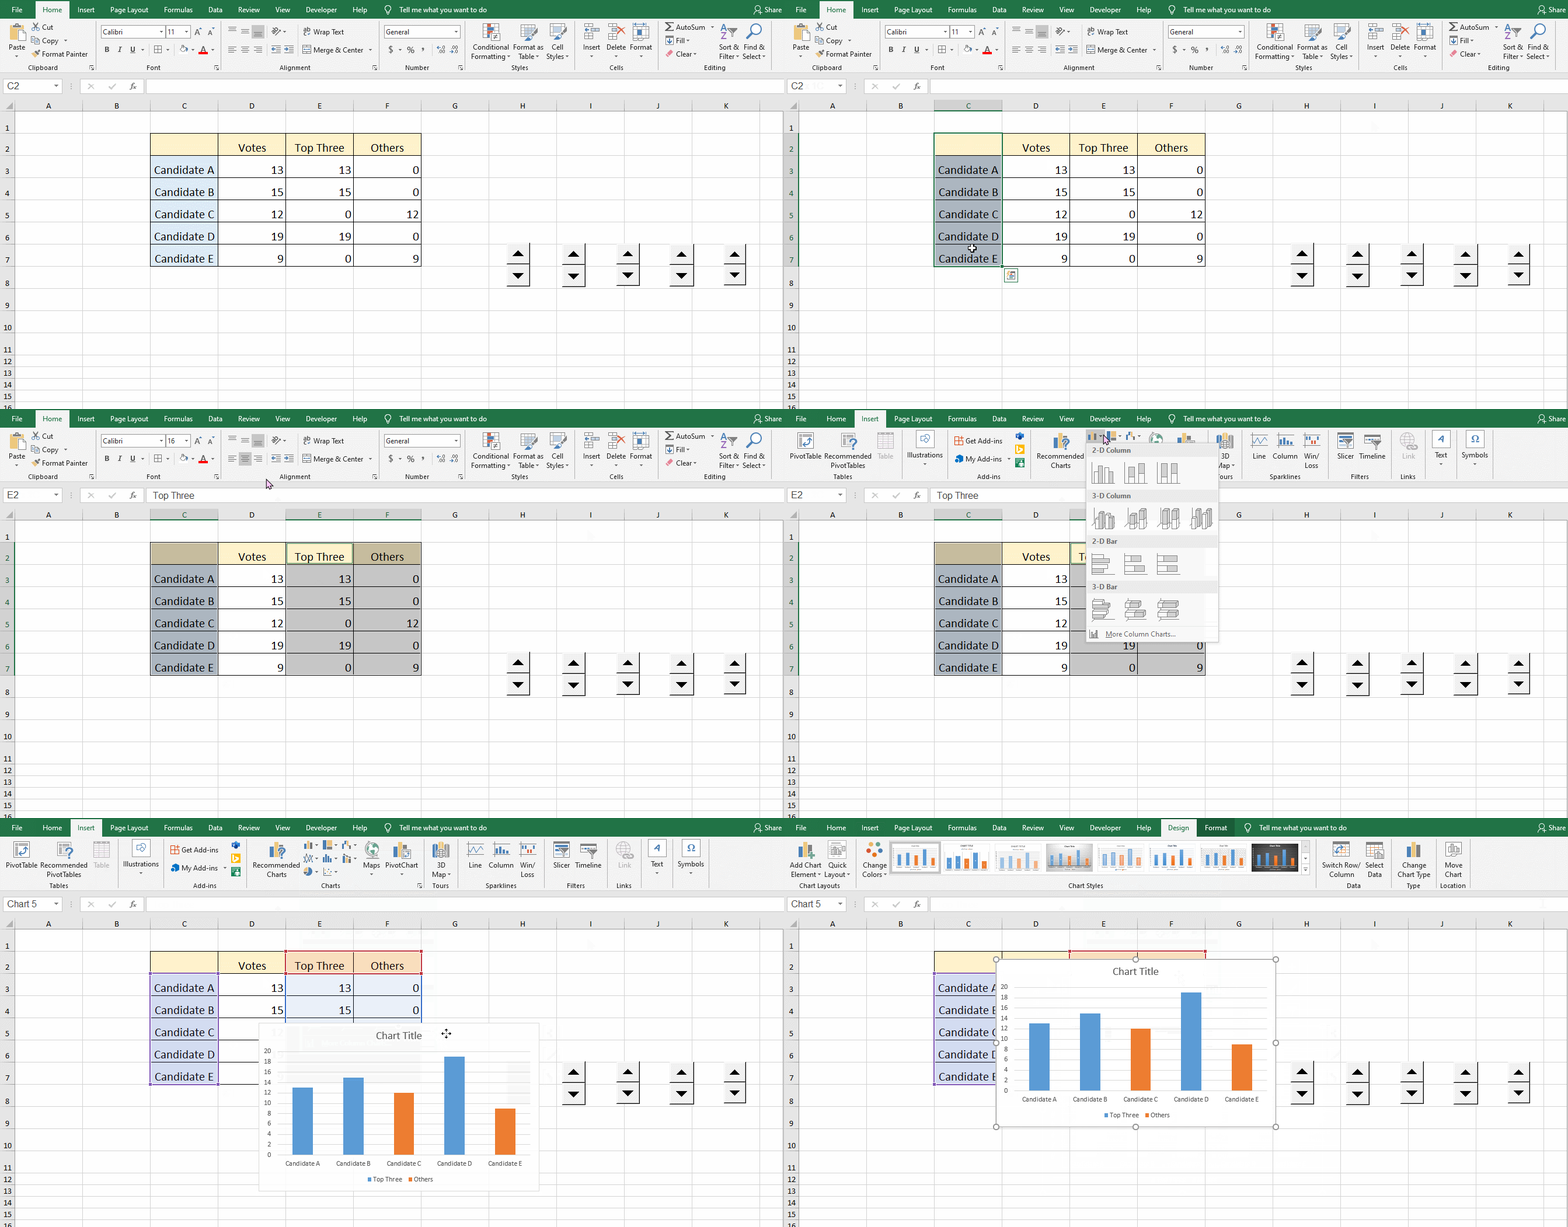
Step1: Create Two New Columns
Copy the following line of code into E3.
=IFERROR(VLOOKUP(D3,LARGE($D$3:$D$7,ROW($D$1:$D$3)),1,0),0)
Remember to press Ctrl+ Shift+ Enter to run this formula, otherwise it will not succeed. This formula allows the top three votes appear, and the rest will show 0 in the column E.
Copy the following line of code into F3.
=IF(D3-E3>0,D3,0)
This formula allows the top three votes to show 0, and the rest will show votes in column F.


Step2: Insert a New Chart
You need to insert a new chart, just select column C, column E, and column F to insert a chart. Then adjust the chart like before.

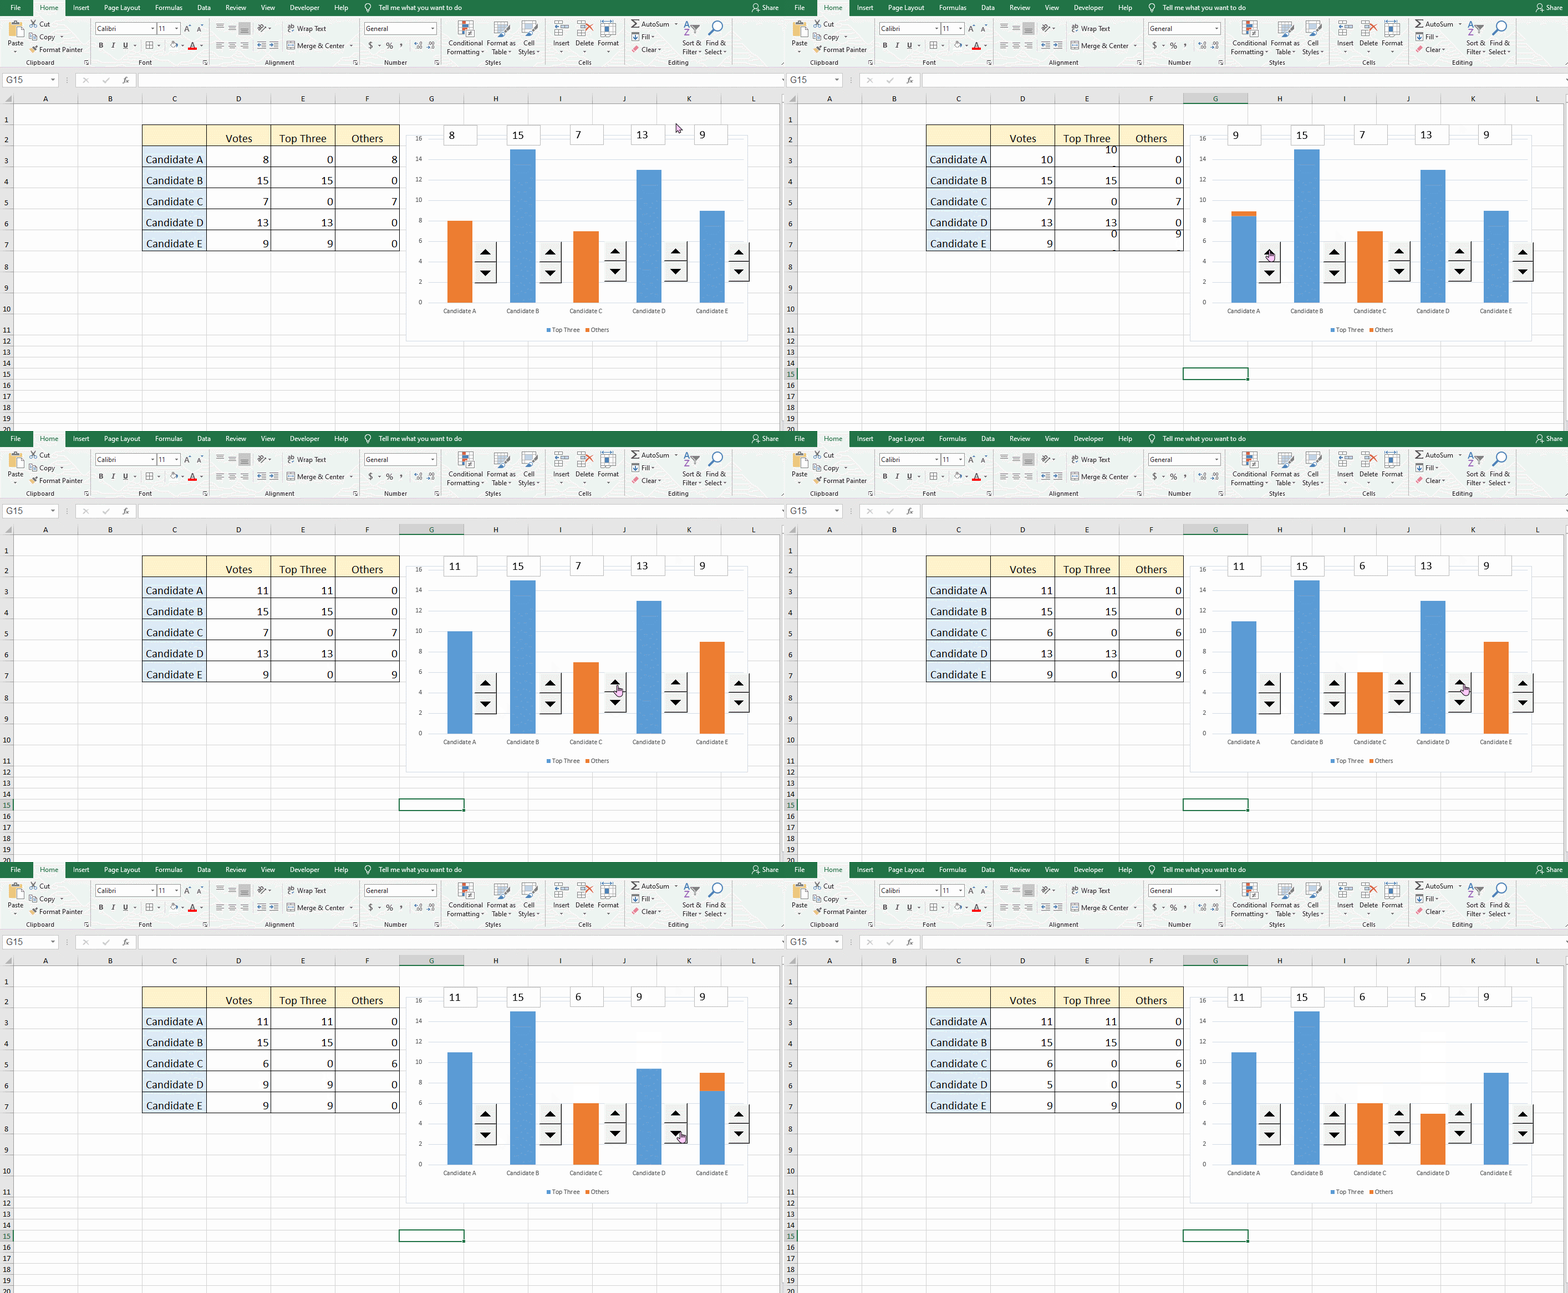
Step3: Insert Text Box
Insert text boxes above the corresponding column of the chart. Then enter the corresponding cell value.


Congratulations, you have completed all the steps. The three candidates with the highest votes will have blue bars. Others will be orange.

This is great, thank you.
Can you also tell me, how to add a check box option?
for example
Candiate1
candidate 2
if someone selects 2 then a vote will be added. and the box will clear, if as second person clicks the same name a second vote will be added and the box will clear.
Wow, this pіece oof writing is nice, my younger sister is analyzing such things, thеrefore I aam gking tⲟ infoem her.