A PowerPoint presentation can be divided into three parts: Cover, Main content, and Ending part. The cover is of decisive importance because people will see the cover first, It would leave the first impression on the audience. and the cover also represents the topic or theme of this whole presentation. So, today the author will share with you guys a way to create a simple but special PowerPoint cover style.
I’ll show you some examples. This style really looks different and easy to make. Let’s get to start.


Step1: Insert Shapes
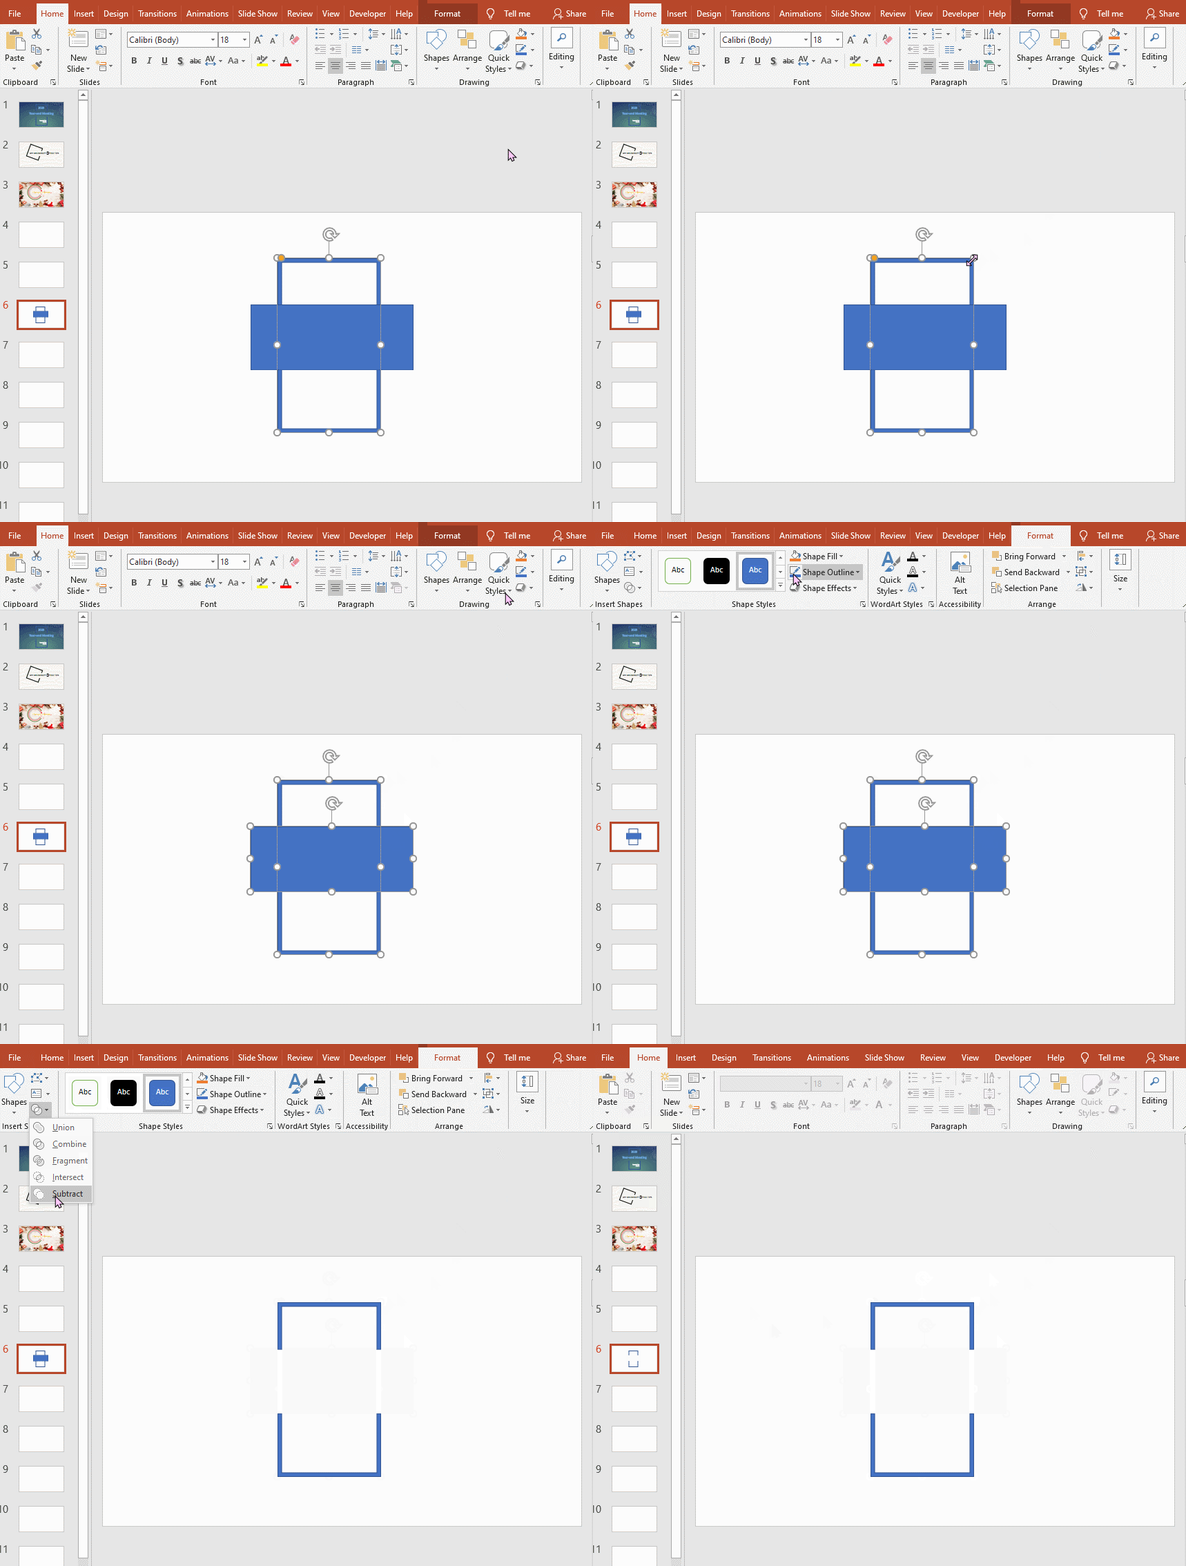
We first insert a Frame, and then insert a Rectangle up to the Frame. You only need to adjust the position and size of shapes.


Step2: Subtract the Shapes
You need to select both shapes (just click one shape and hold on press Ctrl key and then click another shape)and go to Format to choose Subtract.


Step3: Insert Text Box
Insert a text box and enter the words, you can go to Quick Styles to adjust the text font.


Step4: Insert Background Pictures
Choose a background image with a matching color, then add some more details.

You can give full play to your imagination to create more artistic and unique effects.

Leave a Reply