Excel is a powerful tool in which you can process a huge amount of data. But if the file you are editing is so large that you must drag the mouse for a while to view all the content, you may want to add page numbers to the Excel file while printing it out to avoid messing the order up. For this purpose, you should:
1. Open the file you want to add page numbers and switch to Page Layout tab.
2. Then click the small arrow in the bottom right corner of Page Setup section.

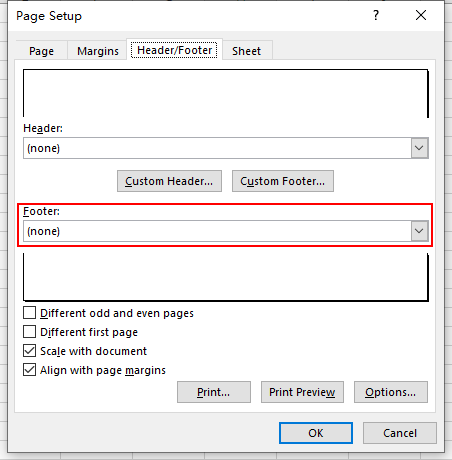
3. Switch to Header/Footer tab in the popping out window of Page Setup, you can see the current situation of the Header and the Footer are both (none). The page numbers are usually in the footer area, so click the small arrow of Footer to open the drop-down menu.

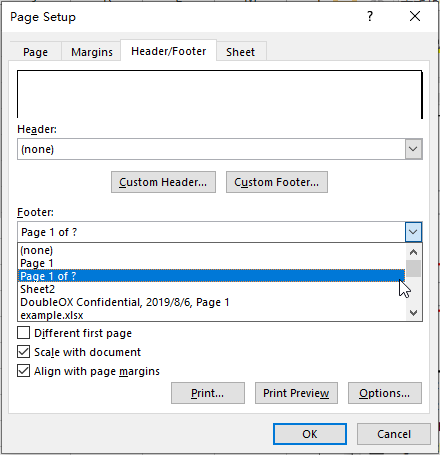
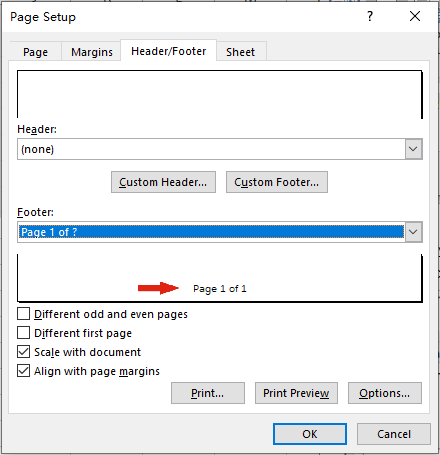
4. Here I choose Page 1 of ? in the list, and then you can see the preview below the select box. If you are satisfied with the result you can hit OK to apply it to your file. Otherwise you can choose other options in the drop-down menu or click Custom Footer… to create a new template according to your actual situation.


5. Now in the Print Preview you can see the page numbers you just added. It will not show in the normal view but in the paper you print out.


Leave a Reply