A worksheet will become slow and heavy if there are too many images in the Excel file. We usually collaborate by sending files via email and a large one that weighs 50 MB can be hard to share with your colleagues.
There are a few methods to reduce the file size of a worksheet, here I’ d like to share the tip of reducing the file size of images to save disk space by compressing them in your Excel file.
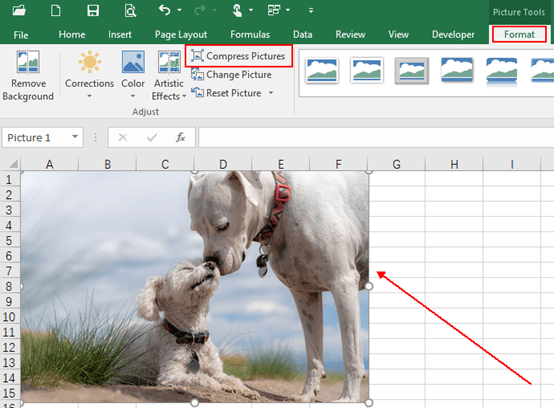
1. Left-click the image which you want to reduce the file size of, go to Format tab and click Compress Pictures in Adjust group.

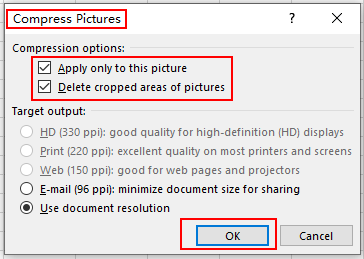
2. The Compress Pictures dialog box will appear, check the box of Apply only to this picture if you want to remain other images unchanged. Next choose one option your preder under Target output, which for me, I usually select Use document resolution. Then hit OK on the bottom to save the settings.

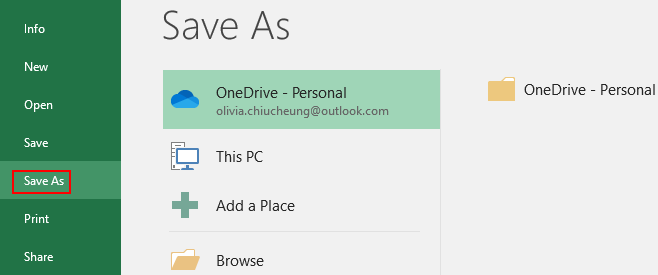
3. Go to File tab and click it in the Ribbon, then hit Save As in the left pane. Now you can find file size of the image has been reduced.


Leave a Reply