Inserting several images in one single slide of PowerPoint requires you to aligne them well, otherwise the layout will look messy. But it is difficult to estimate the distance between images with naked eyes, and if there are lot of pictures to be aligned, arranging them could be very time-consuming. In this case, using Smart Guides can definitely help you aligning images better and quicker.
1. Go to View tab and click the arrow at the right-bottom corner of Show section.

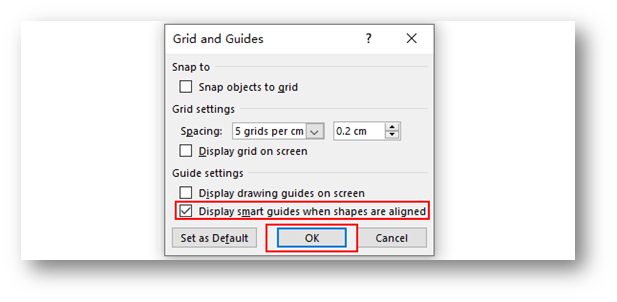
2. The Grid and Guides dialog box will pop up. Check the box of Display smart guides when shapes are aligned under Guide settings. Click OK at the bottom.

3. Then switch to Insert tab, hit Pictures to select the images saved on your device or from Internet. Tap Insert at the bottom right.

4. Drag an image near another one, the dotted lines of Smart Guides will appear automatically, which enables you to place them on a straight line.
5. Move the images horizontally or vertiacally, the equidistant lines of Smart Guides will appear automatically, then you can evenly space out several images.


Leave a Reply