With Snipping Tool, you can capture text, graphics, and any associated annotations and then save them in your desired format. Unfortunately, Windows 10 does not have default keyboard shortcut for Snipping Tool, but you can create one for it. Just read this guide and find the answer you seek:
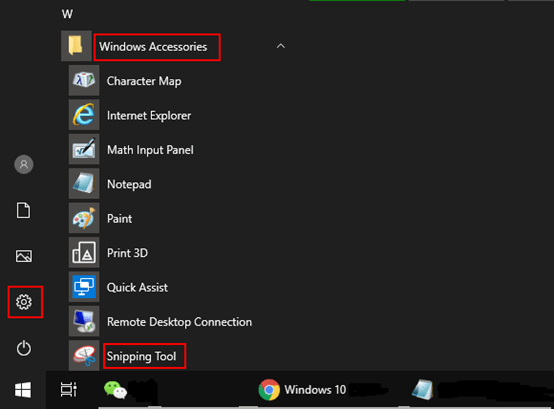
1. Click Start icon at the bottom left of the screen. Next, hit Settings icon in the pop-up window. Scroll down and go to Windows Accessories, then find Snipping Tool in the drop-down list as below:

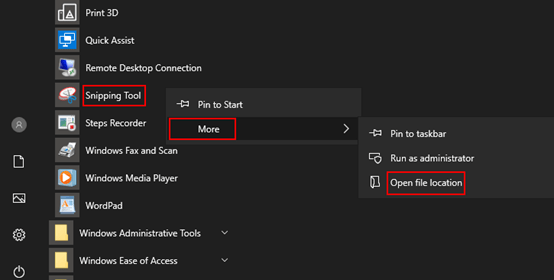
2. Right-click Snipping Tool, then select More – Open file location in the sidebar.

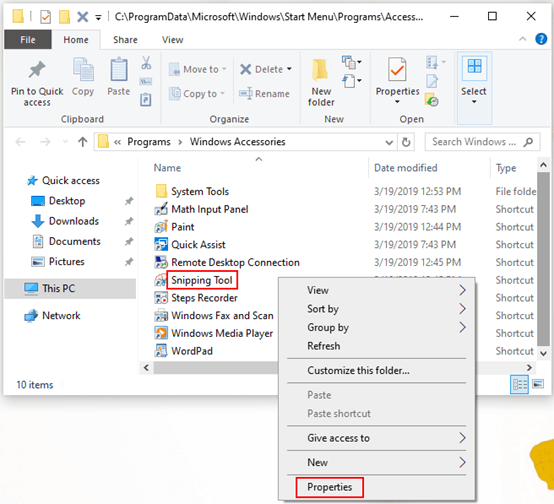
3. When File Location dialog box appears, simply right-click Snipping Tool, and then click Properties in the pop-up box.

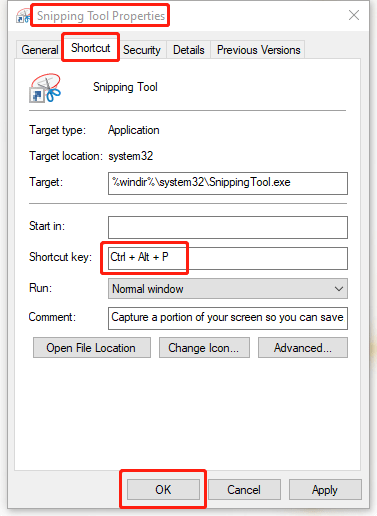
4. When Snipping Tool Properties dialog box comes up, go to Shortcut tab, and move the cursor to the box of Shortcut key. Press [Ctrl] + [Alt] on your keyboard, and here you can choose a letter you prefer, which is located after the last [+]. In the screenshot below, I press [P] as an example. Do not forget to click OK at the bottom to save the settings.

5. Windows 10 will create the new shortcut to the Snipping Tool and will also embed [Ctrl] + [Alt] as the prefix to the shortcut. If you have assigned letter “P” to Snipping Tool, then you need to press [Ctrl] + [Alt] + [P] to launch, for instance.

Leave a Reply