When inserting a removable device or memory card into your computer, you’ll often see Windows “AutoPlay” pops up. But if this feature is annoying, while doing your crucial work. When AutoPlay is enabled, malware or malicious programs might get installed automatically on your system, causing severe damages to your system. Actually you can disable AutoPlay in a simple way on Windows 10, to keep your computer and crucial data safe and secure.
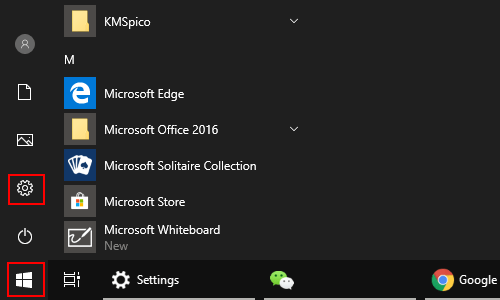
1. Click Start icon at the bottom left of the screen, next click Settings icon in the pop-up window.

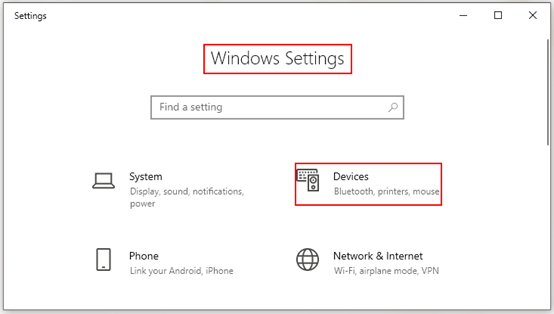
2. The Windows Settings dialog box will display, scroll down and click Devices button.

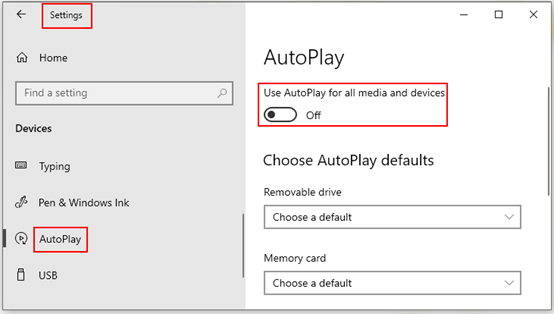
3. Another window of Setting appears, scroll down and select AutoPlay options in the left pane. Then go to the right pane, turn off the switch under Use AutoPlay for all media and devices.

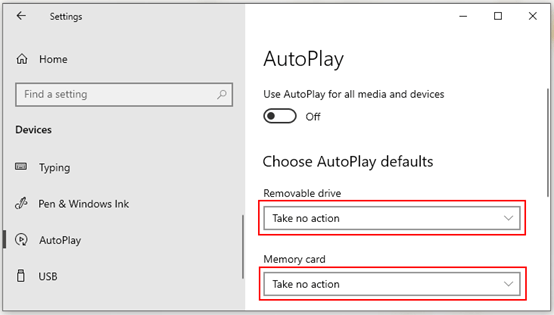
4. Choose Take no action from the drop-down list of Removable drive and Memory card


Leave a Reply