ClearType is a font technology, which makes the text on your screen almost as sharp and clear as text that’s printed on paper. Is the text on your screen looking fuzzy? Then use this guide to enable ClearType on your Windows 10 device, to make text more readable.
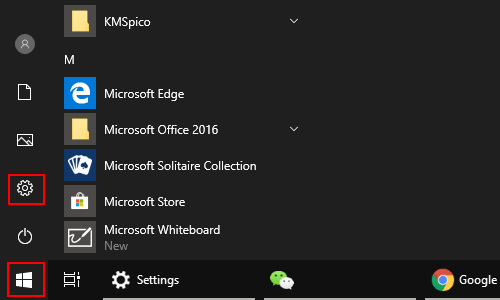
1. Click Start icon at the bottom left of the screen, next click Settings icon in the pop-up window.
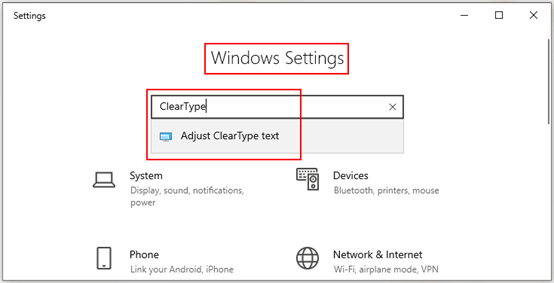
2. The Windows Settings dialog box will display, then enter ClearType into the search box and select Adjust ClearType text in the list.
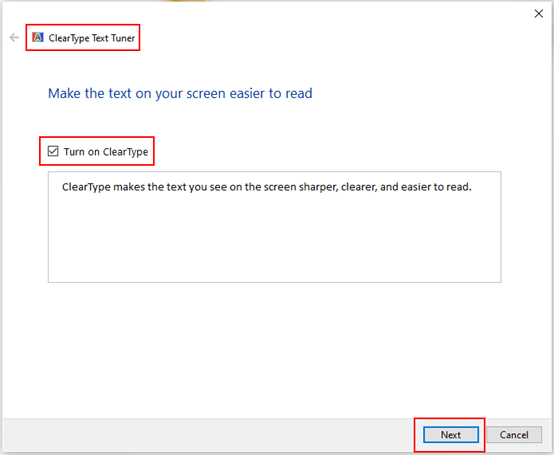
3. The ClearType Text Tuner dialog box displays, make sure that the box of Turn on ClearType is checked, and click Next at the bottom.
Note: ClearType makes the text on your screen sharper, cleared and easier to read.
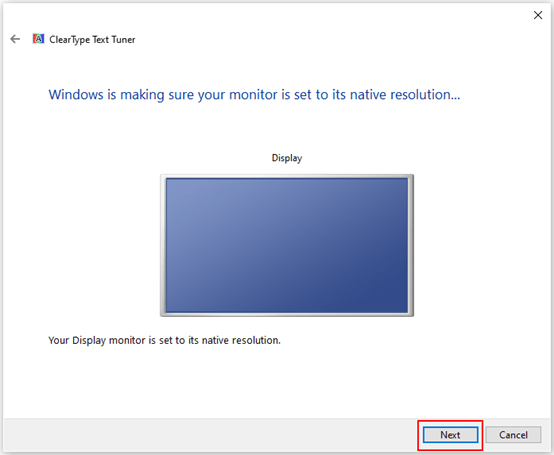
4. Now you go to the next step, and Windows is making sure your monitor is set to its native resolution. Click Next again at the bottom.
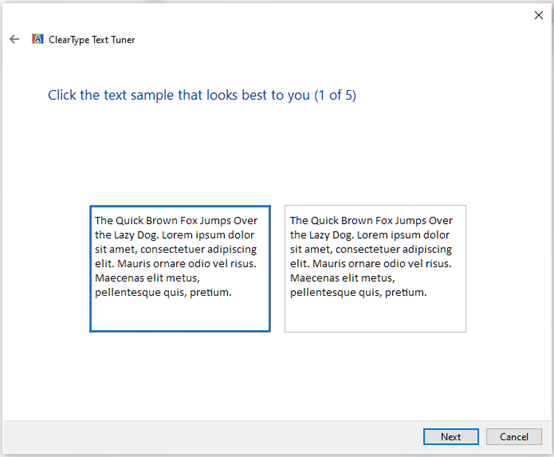
5. There are multiple kinds of text samples, simply click Next at the bottom to jump the pages, and select the one that looks best to you (5 pages in total).
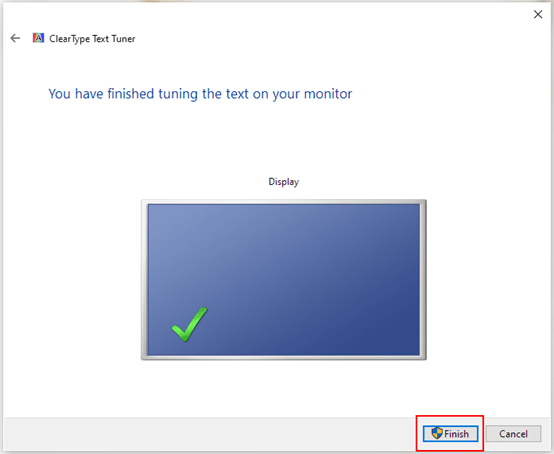
6. When you have finished tuning the text on your monitor, just hit Finish button to save the settings.

Leave a Reply