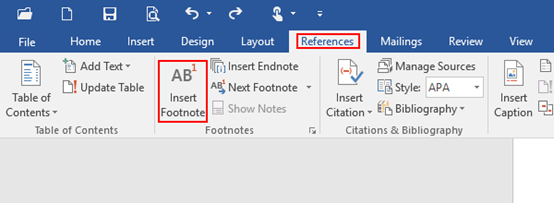
When editing a document, you can insert a footnote to explain or provide references to something you’ve mentioned in the document. Usually, footnotes are displayed at the bottom of the page, and a document may have multiple footnotes if needed. Here I’ d like to share the tip of how to insert and delete a footnote in Microsoft Word.
1. Put the cursor behind the text where you want to insert a footnote. Next go to Reference tab and hit Insert Footnote.

2. Microsoft Word will automatically jump to footnote area, which is in the lower left corner of the current page. Enter all the information in this area based on actual requirements. You can use the same way to insert more footnotes for the whole document.

4. Simply hover the mouse over the number citation in the document and the footnote is displayed as a small pop-up window, much like a tool-tip. You do not need to scroll down to the bottom of the page to read each related footnote.
Note: if you want to delete a footnote, just select the number citation within the document, and press Delete on the keyboard. Then the specific footnote has been deleted and the remaining footnotes will be renumbered.


Leave a Reply