Your Windows 10 PC might go to sleep mode when a program is running in the background, which will result in loss of data. If your PC always goes to sleep at the wrong time, here we’ll show you the method to make your PC never sleep in Windows 10.
1. Click Start icon at the bottom left of the screen.

2. Next, click Settings icon in the pop-up window.

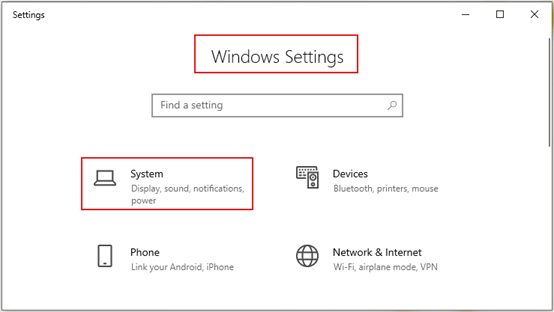
3. The Windows Settings dialog box will display, then click System icon.

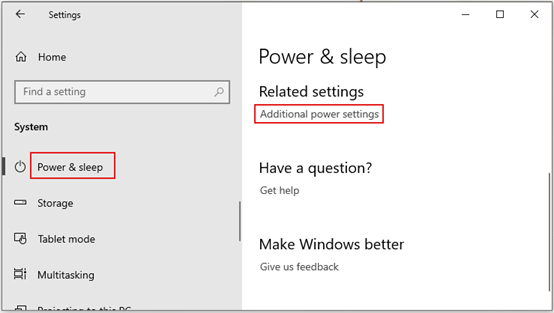
4. Another window of Settings appears, scroll down and click Power & sleep in the left pane. Then go to the right pane, click Additional power settings, which is under Related settings.

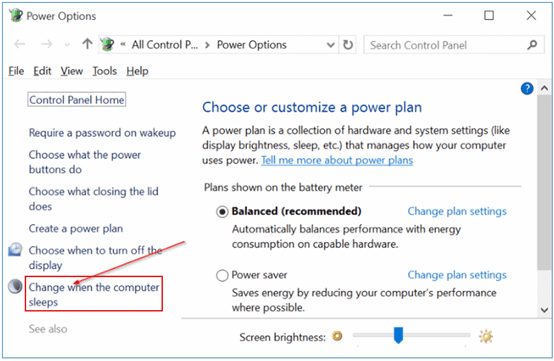
5. The Power Options dialog box comes up, click Change when the computer sleeps in the left pane.

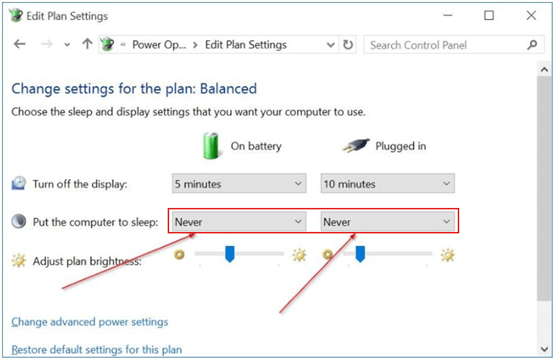
6. When the Edit Plan Settings dialog box pops up, click the drop-down lists which are next to Put the computer to sleep, and select Never for On battery and Plugged in. Do not forger to click Save changes button to save your settings.


Leave a Reply