When connecting to home network or you need computer support, it is necessary to know the name of your computer. Here’s how to find the related information fast and what’s more, you can rename your computer. Let’s take a look at the guide step by step.
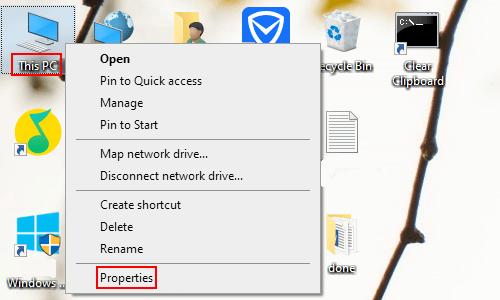
1. Right-click This PC and select Properties in the pop-up box.
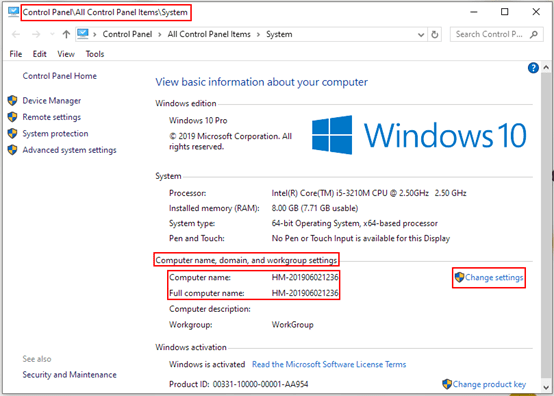
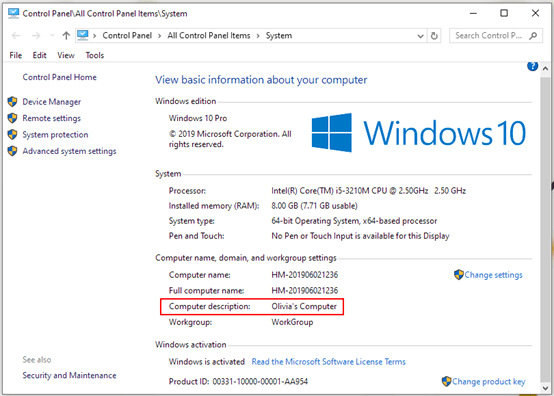
2. Control Panel\All Control Panel Items\System: find Computer name, domain, and workgroup settings group, you can see the default name of your computer, then click Change settings next to them.
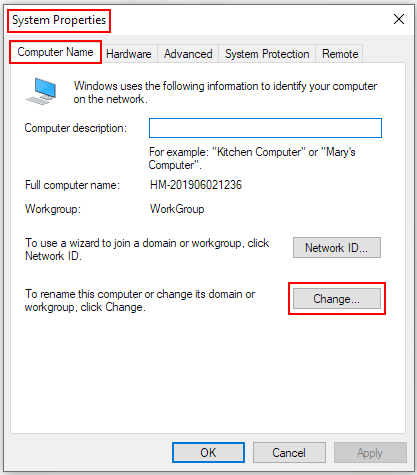
3. The System Properties dialog box comes up, go to Computer Name tab. To rename your computer or change its domain or workgroup, click Change button.
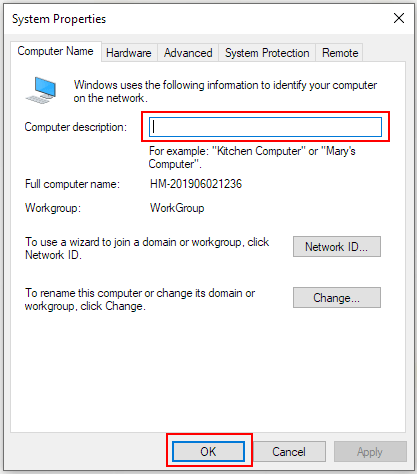
4. After page forwarding, type the name you prefer in the text box of Computer description, for example: “Kitchen Computer” or “Mary’s Computer”. Click OK to save the settings.
5. Now back to Step 2, you will find the Computer description has been renamed accordingly.

Leave a Reply