Windows 10 has a hands-free feature, by using speech recognition you can control your computer only with voice. Sounds convenient, right? Especially when your hands are not free, or you forget how to spell some specific words. So let’s take a look at the steps to turn on Speech Recognition on Windows 10.
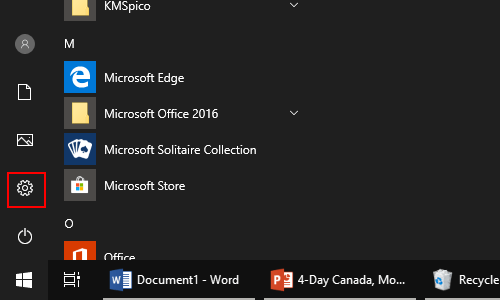
1. Click Start icon at the bottom left of the screen.

2. Next, click Settings icon in the pop-up window.

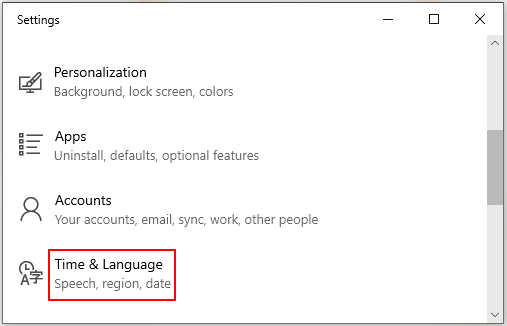
3. The Windows Settings dialog box will display, then click Time & Language icon.

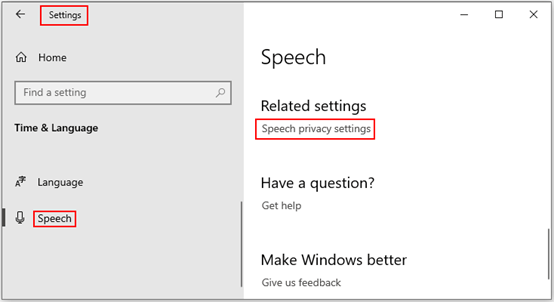
4. Another window of Settings appears, scroll down and click Speech in the left pane. Then go to the right pane, find Related settings and click Speech privacy settings.

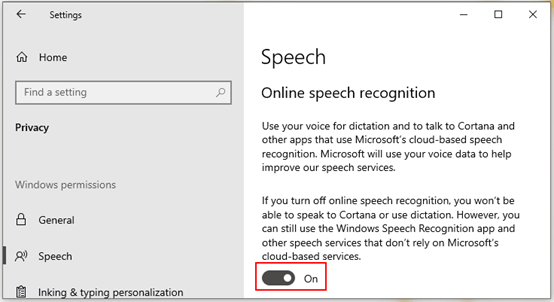
5. Simply turn the switch of Online speech recognition on, which can use your voice for dictation and to talk to Cortana and other apps that use Microsoft’s cloud-based speech recognition.
Note: if you turn off online speech recognition, you won’t be able to speak to Cortana or use dictation. However, you can still use the Windows Speech Recognition app and other speech services that don’t rely on Microsoft’s cloud-based services.


Leave a Reply