Page margins decide the location and size of the Excel sheet in a printed paper. Just like in MS word, you can also customize the page margins in Excel to make it meet your needs, and thereby print a better document.
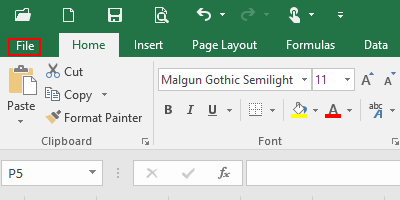
1. First, click File in the upper left corner.

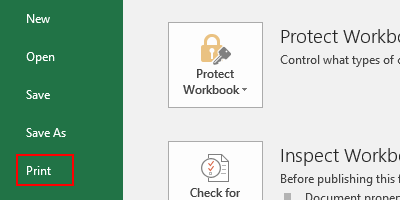
2. Next, click Print in the option box on the left.

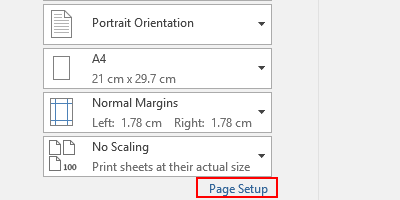
3. Then, click Page Setup in the bottom.

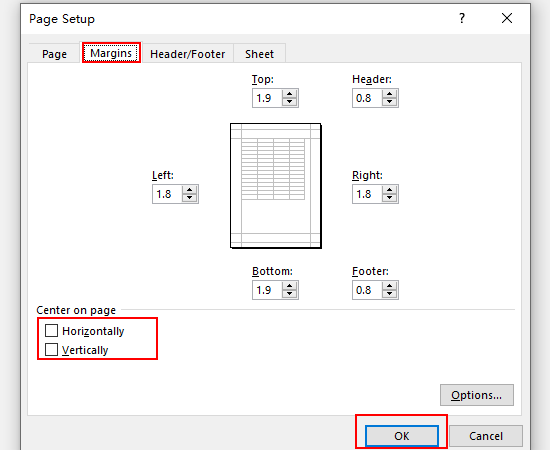
4. When the popup window appears, go to Margins tab, you can make your own decision on TOP, Header, Left, Right, Bottom and Footer.
5. Also you can choose the style of Center on page. After finishing it, click OK to implement it.

6. Then the page margins in Excel will change according to your settings.

I like what you guys are up also. Such intelligent work and reporting! Carry on the excellent works guys I have incorporated you guys to my blogroll. I think it will improve the value of my web site 🙂